
Description
[ad_1]
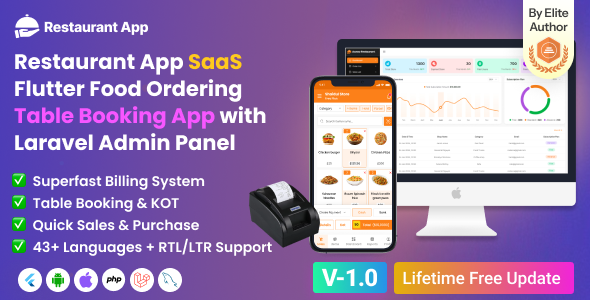
Restaurant App SaaS – Food Ordering & Table Booking Flutter App with Laravel Admin Panel
Transform your restaurant business with this all-in-one SaaS solution! Built with Flutter for a seamless mobile experience and Laravel for powerful backend management, this app supports unlimited users and is perfect for restaurants, fast food joints, coffee shops, burger shops, and more. Two click invoice printer!!!
Key Features:
✔ Food Ordering System – Easy menu browsing, cart management & secure payments.
✔ Table Reservation – Let customers book tables in advance.
✔ Laravel Admin Panel – Full control over orders, bookings, menus & users.
✔ SaaS Ready – Manage multiple restaurants under one system.
✔ Regular License & Support – Reliable updates and assistance.
Boost your business with this scalable, user-friendly app—get yours today on CodeCanyon!


Offer: If you buy the extended license you will get free reskin change Logo, theme color, full setup and upload play store white level
Envato suggests buying an extended license for a SaaS project.
Note: You can now print a sale invoice using any bluetooth thermal printer. All new sales invoice will print automatically. You can also print previous sales invoice from sales report.


|

|

|

|

|
Demo Url: https://posprodemo.acnoo.com/
App Demo
User: acnooteam@gmail.com
pass: 123456
Super Admin Credentials
superadmin@acnoo.com
superadmin
Admin Credentials
admin@acnoo.com
superadmin
Manager Credentials
manager@acnoo.com
manager
Key Features:
Admin Dashboard:
1. Dashboard:
2. Advertising:
3. Store List:
4. Category List:
5. Subscription Plans:
6. Staff Management:
7. Reports:
8. Messages:
9. CMS Manage:
10. Roles & Permissions:
11. Settings:
App Features:
1. Product Catalog:
2. Sales Processing:
3. Parties:
4. Sales & Purchase list:
5. Sales Edit:
6. Reports:
7. Loss/Profit:
8. Stock:
9. Inventory Management:
10. User-Role:
11. Subscription Plan:
12. Multi-User Access:
13. User-Friendly Interface:
Benefits of Restaurant App
Grow your business effortlessly with a scalable solution that adapts to your needs.
Realy on a robust and secure Laravel backend for data integrity and reliability.
SaaS model ensures affordability with no upfront infrastructure costs.
Make informed decisions with real-time analytics accessible to super admins.
Streamline your business operations, from inventory management to sales processing, for maximum efficiency.
Super Admin capabilities provide centralized control over your entire business network.
Restaurant App SaaS – Food Ordering & Table Booking Flutter App with Laravel Admin Panel (Flutter App+Super Admin backend Laravel) is not just a POS system; it’s a comprehensive solution that empowers super admins and admins like to streamline operations, enhance efficiency, and drive business growth.
Application Features:
- SaaS Ready Application with Laravel backend
- Easy to modify subscription package
- Clean Code and a well-structured project
- The single code base for both Android & iOS
- Thermal Bluetooth printer integration with automatic and manual printing
- Fully responsive UI
- Best UI & UX
- Great animation
- Easy to customize
- Free lifetime updates & stunning customer support
- Easy to integrate into your project
Flutter and Android Studio Setup Guide
Follow these steps to set up your development environment for Flutter:
Step 1: Install Flutter
Download and install Flutter by following the official instructions:
Step 2: Install Android Studio
Download and install Android Studio from the official website:
Step 3: Set Up Android Studio
- Open Android Studio.
- Go to File > Settings (on macOS, go to Android Studio > Preferences).
- Navigate to Appearance & Behavior > System Settings > Android SDK.
- Ensure that the Android SDK and necessary tools are installed.
Step 4: Configure Flutter in Android Studio
- Open Android Studio.
- Go to File > Settings (on macOS, go to Android Studio > Preferences).
- Navigate to Plugins and search for “Flutter”.
- Install the Flutter plugin and restart Android Studio.
- After restarting, open File > New > New Flutter Project to start a new Flutter project.
Step 5: Set Up Your Device
- Enable Developer Mode on your Android device.
- Enable USB Debugging from the Developer Options.
- Connect your device to your computer via USB.
Once you have completed these steps, you are ready to start developing with Flutter and Android Studio.


<pre>
Version 1.0.0
Initial Release</pre>

<pre>
Version 1.1 update
Added Landing page
Update Flutter version 3.32.5
code optimized
</pre>
[ad_2]
Source